Installation
This section covers installing hardened Gentoo with an encrypted root partition on a machine which boots using UEFI. This section follows the Gentoo Handbook (https://wiki.gentoo.org/wiki/Handbook:AMD64), but explains specifically how I configured my system, and thus does not explain all the different choices discussed in the handbook.
Setup
Make a bootable flash drive
First, make a flash drive with a bootable version of Gentoo on it. Either a minimal installation disk or a LiveDVD works, and both are available from https://www.gentoo.org/downloads/. However, only the LiveDVD can boot using UEFI, and thus only the LiveDVD can be used to set up a system which will boot from UEFI [1] . The LiveDVD has a full KDE desktop environment which might be easier to use, but is not necessary. Download the image and the .DIGESTS.asc file. See Fig. 1 for an image of the download page.
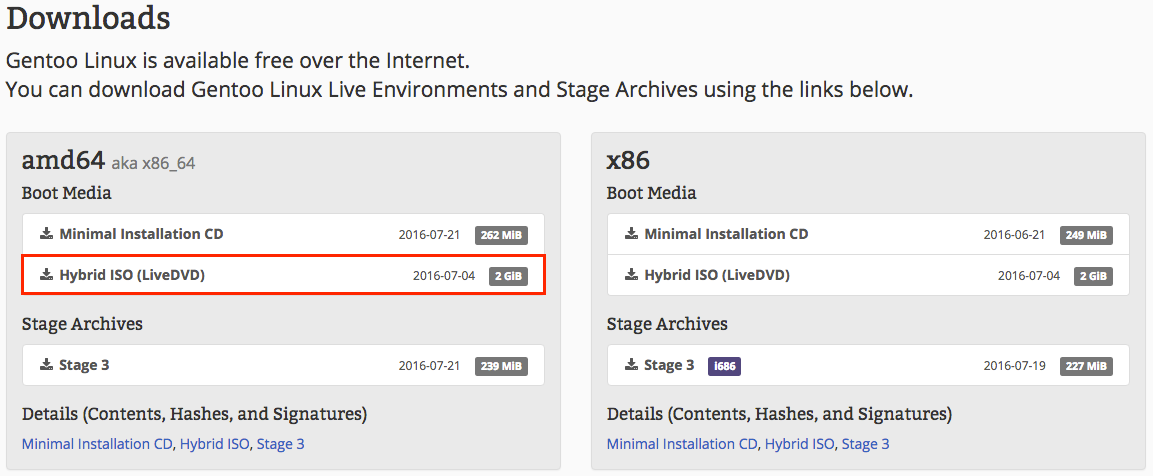
Fig. 1 Location of the LiveDVD download for amd64 computers on the Gentoo downloads page.
Next, get the Gentoo keys:
$ gpg --keyserver hkps.pool.sks-keyservers.net --recv-keys 0xBB572E0E2D182910
A list of the keys is available at https://www.gentoo.org/downloads/signatures/. The 0xBB572E0E2D182910 key ID is the “Gentoo Linux Release Engineering (Automated Weekly Release Key)” which is probably the key that the ISO file was signed with.
Then, verify the file:
$ gpg --verify install-amd64-minimal-20141204.iso.DIGESTS.asc
GPG should say something like Good signature from "Gentoo Linux Release Engineering (Automated Weekly Release Key) <releng@gentoo.org>". After that, it will print the fingerprint of the key: Primary key fingerprint: 13EB BDBE DE7A 1277 5DFD B1BA BB57 2E0E 2D18 2910. If the signature is good and the key fingerprint matches the one at https://www.gentoo.org/downloads/signatures/, then the digests file is good.
Next, compute the SHA 512 sum of the ISO file. On Linux, use:
$ sha512sum install-amd64-minimal-20141204.iso
On OS X, use:
$ shasum -a 512 install-amd64-minimal-20141204.iso
Finally, get the expected hash, which will be:
$ grep -m 1 -i sha512 install-amd64-minimal-20141204.iso.DIGESTS.asc
The -m 1 makes grep only print the first match, and the -i makes it case insensitive. If the expected hash matches the actual hash, continue. Otherwise, try downloading the file again, perhaps from a different mirror.
Next, burn the ISO file to a CD, or copy it to a flash drive. The standard way to copy the image to a flash drive at /dev/sda is with dd:
$ dd if=install-amd64-minimal-20141204.iso of=/dev/sda bs=1M
The input file (if) is the downloaded ISO, and the output file (of) is the flash drive. To determine the name of the flash drive, use fdisk -l on Linux or, on OS X, use diskutil list. Finally, bs is the block size. 1 mebibyte generally works well. On OS X, use bs=1m.
While this works, dd does not have a progress indicator. To solve this, use a combination of pv and dd:
$ pv install-amd64-minimal-20141204.iso | dd of=/dev/sda bs=1M
pv copies its input file to standard output, and displays a progress bar with the status of the copy. It is also possible to use pv by itself:
$ pv install-amd64-minimal-20141204.iso > /dev/sda
However, then you cannot control the block size. According to a benchmark online [2], cat (which is about the same as pv) performs about the same as dd:
| Command | Same (s) | Diff (s) |
|---|---|---|
dd bs=64M |
71.1 | 51.3 |
dd bs=1M |
73.9 | 41.8 |
dd bs=4k |
79.6 | 48.5 |
dd bs=512 |
85.3 | 48.9 |
cat |
76.2 | 41.7 |
cp |
77.8 | 45.3 |
The same column is the copying time of a 2 GB file from the original filesystem to a different file on the same filesystem. The diff column is the copying of a 2 GB file to a different drive. For the same column, cat is about 7.2% slower than dd. For the diff column, cat is about equal to the fastest dd run. Thus, just using pv by itself is probably fine.
Booting
Plug the flash drive into the computer, and boot the computer from the flash drive [3]. (Use the BIOS or UEFI boot menu.)
Configuring the Network
If the computer is plugged in with an Ethernet cable and is assigned an IP address using DHCP, then the network probably just works. Test it by pinging Google:
# ping google.com
If the network does not work, follow the Gentoo handbook: https://wiki.gentoo.org/wiki/Handbook:AMD64/Installation/Networking.
Partitioning
The disk will have three partitions on it: one for GRUB (the GRand Unified Bootloader), one for /boot, and the encrypted partition. The encrypted partition (encr) will be set up with Logical Volume Management (LVM) to one volume group on it (vg1), which will hold two logical volumes: the root filesystem and swap. Assuming the disk is at /dev/sda, the partition structure will look like this:
/dev/sda
|-- /dev/sda1 (vfat, grub)
|-- /dev/sda2 (ext4, boot)
`-- /dev/sda3 (encr)
    `-- vg1
        |-- dev/vg1/root (ext4, root)
        `-- /dev/vg1/swap (swap)
As the computer will use the Unified Extensible Firmware Interface (UEFI) [4] to boot, the disk must use a GUID Partition Table (GPT). To make a GPT partition table, first install gdisk by using the command:
# emerge gptfdisk
Then, run gdisk:
# gdisk
GPT fdisk (gdisk) version 1.0.1

Type device filename, or press <Enter> to exit: /dev/sda
Partition table scan:
  MBR: not present
  BSD: not present
  APM: not present
  GPT: not present

Creating new GPT entries.

Command (? for help):
gdisk provides the following commands:
b    back up GPT data to a file
c    change a partition's name
d    delete a partition
i    show detailed information on a partition
l    list known partition types
n    add a new partition
o    create a new empty GUID partition table (GPT)
p    print the partition table
q    quit without saving changes
r    recovery and transformation options (experts only)
s    sort partitions
t    change a partition's type code
v    verify disk
w    write table to disk and exit
x    extra functionality (experts only)
?    print this menu
Now, make the grub partition:
Command (? for help): n
Partition number (1-128, default 1):
First sector (34-16383966, default = 2048) or {+-}size{KMGTP}:
Last sector (2048-16383966, default = 16383966) or {+-}size{KMGTP}: +2M
Current type is 'Linux filesystem'
Hex code or GUID (L to show codes, Enter = 8300): EF02
Changed type of partition to 'BIOS boot partition'
The 2 MiB size is the size specified in the Gentoo handbook, as is the initial 2048 byte offset [6]. The 0xEF02 code is the partition type [5].
Next, make the boot partition:
Command (? for help): n
Partition number (2-128, default 2):
First sector (34-16383966, default = 6144) or {+-}size{KMGTP}:
Last sector (6144-16383966, default = 16383966) or {+-}size{KMGTP}: +128M
Current type is 'Linux filesystem'
Hex code or GUID (L to show codes, Enter = 8300):
Changed type of partition to 'Linux filesystem'
Once again, the 128 MiB size is from the Gentoo handbook.
Finally, make the encrypted partition:
Command (? for help): n
Partition number (3-128, default 3):
First sector (34-16383966, default = 268288) or {+-}size{KMGTP}:
Last sector (268288-16383966, default = 16383966) or {+-}size{KMGTP}:
Current type is 'Linux filesystem'
Hex code or GUID (L to show codes, Enter = 8300):
Changed type of partition to 'Linux filesystem'
This uses up the rest of the disk. Now, name the partitions. Call the first partition grub, the second one boot and the third one encr. Use the c command to do this:
Command (? for help): c
Partition number (1-3): 1
Enter name: grub

Command (? for help): c
Partition number (1-3): 2
Enter name: boot

Command (? for help): c
Partition number (1-3): 3
Enter name: encr
Type p to see the result:
Command (? for help): p
Disk /dev/sda: 16384000 sectors, 7.8 GiB
Logical sector size: 512 bytes
Disk identifier (GUID): E394C90D-8445-4B21-8247-A0BFCCD827B9
Partition table holds up to 128 entries
First usable sector is 34, last usable sector is 16383966
Partitions will be aligned on 2048-sector boundaries
Total free space is 2014 sectors (1007.0 KiB)

Number  Start (sector)    End (sector)  Size       Code  Name
   1            2048            6143   2.0 MiB     EF02  grub
   2            6144          268287   128.0 MiB   8300  boot
   3          268288        16383966   7.7 GiB     8300  encr
Use the w command to write the new partition to the disk:
Command (? for help): w

Final checks complete. About to write GPT data. THIS WILL OVERWRITE EXISTING
PARTITIONS!!

Do you want to proceed? (Y/N): Y
OK; writing new GUID partition table (GPT) to /dev/sda.
The operation has completed successfully.
Encrypting
Configure encryption
There are two ways to encrypt the encrypted partition: with a keyfile or with a passphrase. The Linux Unified Key Setup (LUKS) supports 8 key slots, each of which can be either a passphrase or keyfile. The purpose of using a keyfile rather than a passphrase is that the keyfile can be stored on a flash drive. Then, the computer will only boot with the flash drive plugged in.
Creating a keyfile
To use a keyfile, first plug in the flash drive where you will store it. Determine the disk ID of the flash drive (using fdisk -l), and then mount it:
# mkdir -p /media/usb
# mount /dev/sdb1 /media/usb
The mkdir command makes the directory for mounting the drive, and the -p flag causes it to make all intermediate directories (first it makes /media, then it makes /media/usb; without the -p flag it would fail because /media would not exist). The mount command mounts the first partition of the flash drive (/dev/sdb1) at the /media/usb folder.
In order for the cryptsetup command to work with a key file, it needs a plain text (unencrypted) file. However, creating such a plain text file on a disk is insecure because it is hard to erase it securely, so someone might be able to recover it even if you delete and gain access to your data. The easiest way around this problem is to create a temporary RAM disk. Do this using the mount command:
# mkdir /ramfs
# mount -t ramfs -o size=512 ramfs /ramfs
This command creates a temporary RAM filesystem with a size of 512 bytes (the exact size of the key file, but it can be bigger and will grow if more space is needed) mounted at /ramfs. The format of the mount command is:
# mount -t <type> -o size=<size> <file system type> <mount point>
The type is the type of RAM filesystem, which is either tmpfs or ramfs. While tmpfs is newer and generally better, tmpfs may use swap space if it runs out of space on RAM, and ramfs will not [7]. Since the whole point is to avoid writing the plain text keyfile to disk, use ramfs, not tmpfs. The size is the starting size of the filesystem for a ramfs, which can grow, and the absolute size of a tmpfs which cannot grow. The file system type is the type of file system, and the mount point is the folder where it is mounted.
Next, create the key file:
# head -c 512 /dev/urandom > /ramfs/keyfile.bin
This command takes the first 512 bytes from the random number stream /dev/urandom [8] and writes them to the file /ramfs/keyfile.bin. It is a good idea to give the key file a meaningful name to keep track of which drive it decrypts. For example, incorporate the hard drive’s make, model, serial number, and partition number to into its name. To get this information, use lshw:
# lshw | less
The output will be very long, and less will allow you to scroll through it using the space bar to go down a page and ‘b’ to go up a page. Look for the a sction like this:
*-scsi:1
          physical id: 2
          logical name: scsi1
          capabilities: emulated
        *-disk
             description: ATA Disk
             product: APPLE SSD TS256C
             physical id: 0.0.0
             bus info: scsi@1:0.0.0
             logical name: /dev/sdb
             version: 0201
             serial: 11NS11DCTLNZ
             size: 233GiB (251GB)
             capabilities: partitioned partitioned:dos
             configuration: ansiversion=5 sectorsize=512 signature=e9b7948b
To look at the keyfile, do hexdump /ramfs/keyfile.bin.
For an extra layer of security, encrypt the keyfile. Then, not only will the flash drive have to be plugged into the computer for it to boot, but you will also have to type a password. To do this, use gpg:
# gpg --symmetric -o /media/usb/keyfile.bin.gpg /ramfs/keyfile.bin
The GNU Privacy Guard (gpg) is a general purpose encryption program. The --symmetric flag makes it use a symmetric cipher (which uses the same key for encryption and decrypting) as opposed to the default public key cipher. The -o file specifies the output file, and the final argument is the input file. Note that the encrypted file is stored on the flash drive, which will be needed to boot the computer. gpg will prompt you for a password.
If you do not plan to encrypt the key file (which you really should), copy it out of the RAM filesystem onto the flash drive (note that the gpg command above writes the encrypted file to the flash drive):
# cp /ramfs/keyfile.bin /media/usb/keyfile.bin
Encrypting the partition
One optional step is writing random data to the partition:
# pv /dev/urandom -s 1000G | dd of=/dev/sda3 bs=1M
After this, the whole partition will look random so it will be impossible to figure out how much stuff is on it. This improves the security [9]. However, this took me about 24 hours for the 1 TB drive that I used. For a 3 TB WD Red drive, it took 75 hours. The -s argument to pv should be close to the actual size of the drive to get a good progress bar.
Next, encrypt the drive. If using a key file, type:
# cryptsetup --cipher aes-xts-plain -s 512 --key-file /ramfs/keyfile.bin luksFormat /dev/sda3
The cipher aes-xts-plain with the sha-512 hash is a pretty standard combination [10]. The --key-file /ramfs/keyfile.bin specifies the key file to use. This must be the plaintext keyfile even if you plan on using an encrypted key. To use a passphrase, omit this argument. The luksFormat command makes cryptsetup format the partition as an encrypted volume. Finally, /dev/sda3 is the third partition on /dev/sda, which is the encrypted partition.
To see the new LUKS setup, use:
# cryptsetup luksDump /dev/sda3
LUKS header information for /dev/sda3

Version:        1
Cipher name:    aes
Cipher mode:    xts-plain
Hash spec:      sha1
Payload offset: 4096
MK bits:        512
MK digest:      b0 db 17 55 b7 58 94 5b 1c b0 19 9d 79 68 2f 1a 3a 87 cf 49
MK salt:        23 f8 05 f5 1e db 64 66 31 e7 73 26 2b 91 3f 50
                17 e5 65 99 7c 63 88 bb 65 11 b7 90 8d 11 c1 c6
MK iterations:  192750
UUID:           74117333-2efa-462b-9dde-22ca6deace42

Key Slot 0: ENABLED
        Iterations:             773413
        Salt:                   ed 1b 8f 47 90 84 23 3d 5c de 7d 7d 51 55 6e 99
                                61 a4 ab 18 3f 80 5f 2f 45 1e 69 ac 82 9b 31 da
        Key material offset:    8
        AF stripes:             4000
Key Slot 1: DISABLED
Key Slot 2: DISABLED
Key Slot 3: DISABLED
Key Slot 4: DISABLED
Key Slot 5: DISABLED
Key Slot 6: DISABLED
Key Slot 7: DISABLED
Now, mount an unencrypted view of the encrypted partition:
# cryptsetup --key-file /ramfs/keyfile.bin luksOpen /dev/sda3 encr
This opens a decrypted view of the partition at /dev/mapper/encr.
If you used a keyfile, be sure the unmount the RAM filesystem so the plain text key file is no longer available:
# umount /ramfs
Configure LVM
Now that the encryption has been set up, the next step is to set up the root and swap logical volumes. First, create the physical volume, which will hold the logical volumes:
# pvcreate /dev/mapper/encr
Then, create a volume group named vg1 to hold the volumes:
# vgcreate vg1 /dev/mapper/encr
Activate the volume group:
# vgchange -a y vg1
Next, create the swap logical volume:
# lvcreate -L 34G -n swap vg1
The -L flag species the size of the partition, which is in this case 34 GiB. In order to support hibernation (saving the contents of RAM to swap), the swap partition must be at least as big as the amount of RAM installed [11]. Finally, vg1 is the parent volume group. The swap volume will be at /dev/vg1/swap.
Create the root logical volume:
# lvcreate -l 100%FREE -n root vg1
The 100%FREE makes the root volume use up the remaining space. Note the lowercase l. The root volume will be at /dev/vg1/root.
Create the filesystems
The newly created partitions need to be formatted in order to hold data. First, the grub partition must be FAT according to the UEFI standard:
# mkdosfs /dev/sda1
Remember that the grub partition is at /dev/sda1.
Second, make the boot partition and the root partition ext4 [12]:
# mkfs.ext4 /dev/sda2
# mkfs.ext4 /dev/vg1/root
Finally, set up the swap partition and turn it on:
# mkswap /dev/vg1/swap
# swapon /dev/vg1/swap
To check the status of the swap partition, use the following command:
# swapon -s
Filename                          Type           Size    Used   Priority
dev/vg1/swap                      partition      524284  0      -1
Mount the filesystems
The last step is to mount the filesystems:
# mkdir -p /mnt/gentoo
# mount /dev/vg1/root /mnt/gentoo
# mkdir -p /mnt/gentoo/boot
# mount /dev/sda2 /mnt/gentoo/boot
# mkdir -p /mnt/gentoo/boot/efi
# mount /dev/sda1 /mnt/gentoo/boot/efi
Installing stage 3
Set the date and time
Check the date and time:
# date
Wed Jun 15 09:58:45 UTC 2016
If the date or time is wrong, set it, using UTC time (the timezone will be set later):
# date MMDDhhmmYYYY
For example, Janurary 2 2016 at 15:42 (UTC) would be:
# date 010215422016
Downloading the stage 3 tarball
This guide uses a hardened 64 bit stage 3 tarball with multilib. The difference between the multilib and no multilib tarballs is that a no multilib system will only run 64 bit libraries, while the multilib system tries to use 64 bit libraries whenever possible, but will use 32 bit libraries if needed [13] .
First, go to the Gentoo directory:
# cd /mnt/gentoo
Then, using the lynx browser, pick a mirror (see Fig. 2 and Fig. 3):
# lynx https://www.gentoo.org/downloads/mirrors/
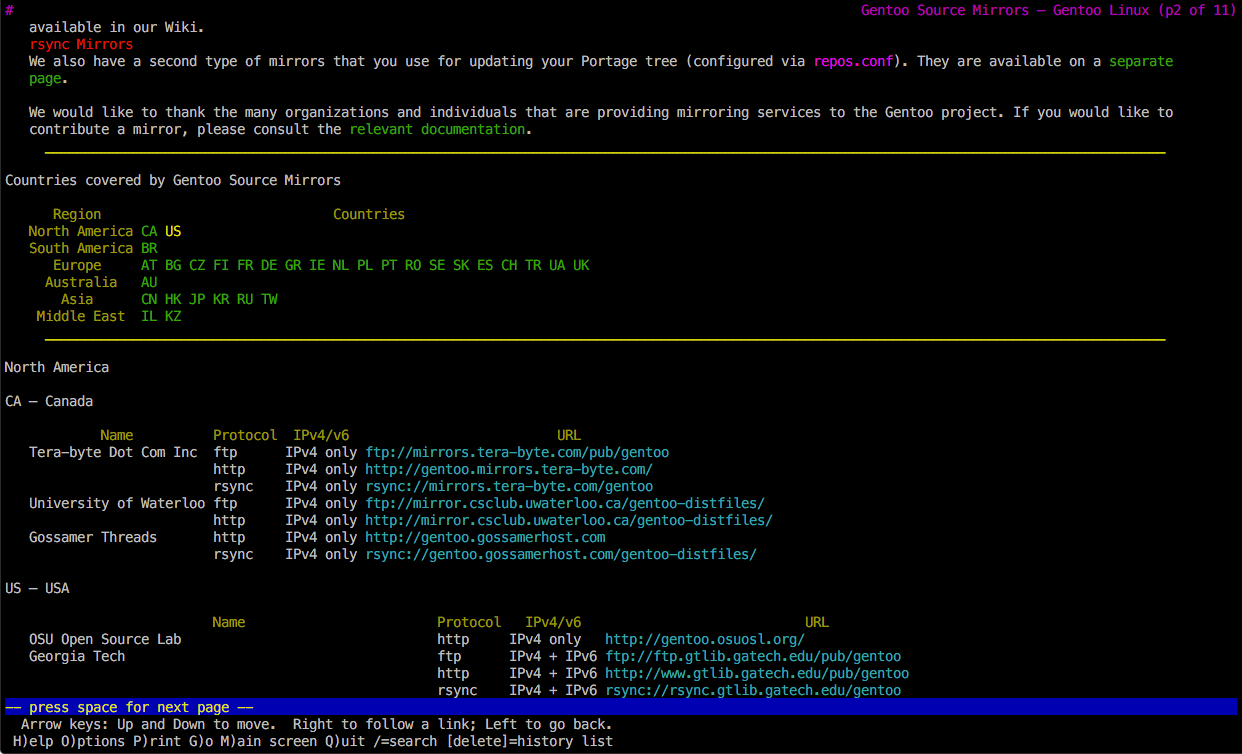
Fig. 2 Selecting the mirror region with lynx.
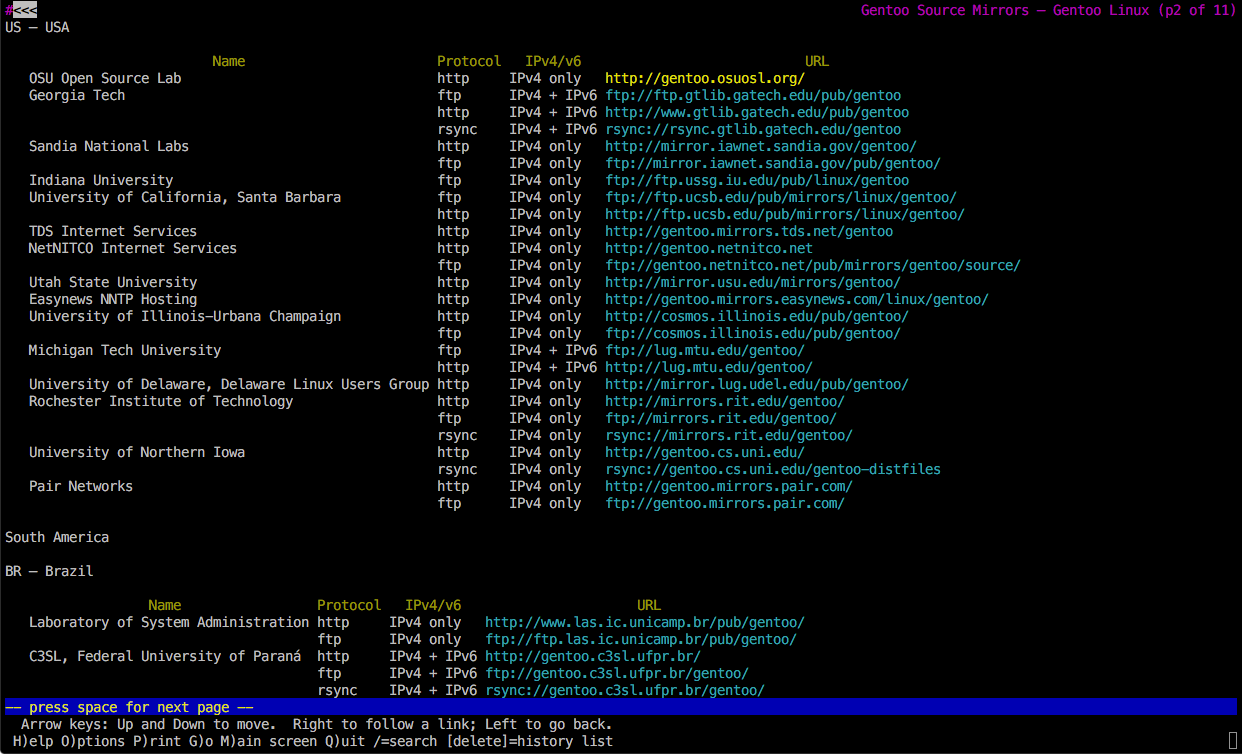
Fig. 3 Selecting a mirror within the US with lynx.
Go to releases/amd64/autobuilds/current-stage3-amd64-hardened/ and download stage3-amd64-hardened-20160609.tar.bz2 and stage3-amd64-hardened-20160609.tar.bz2.DIGESTS.asc (see Fig. 4).
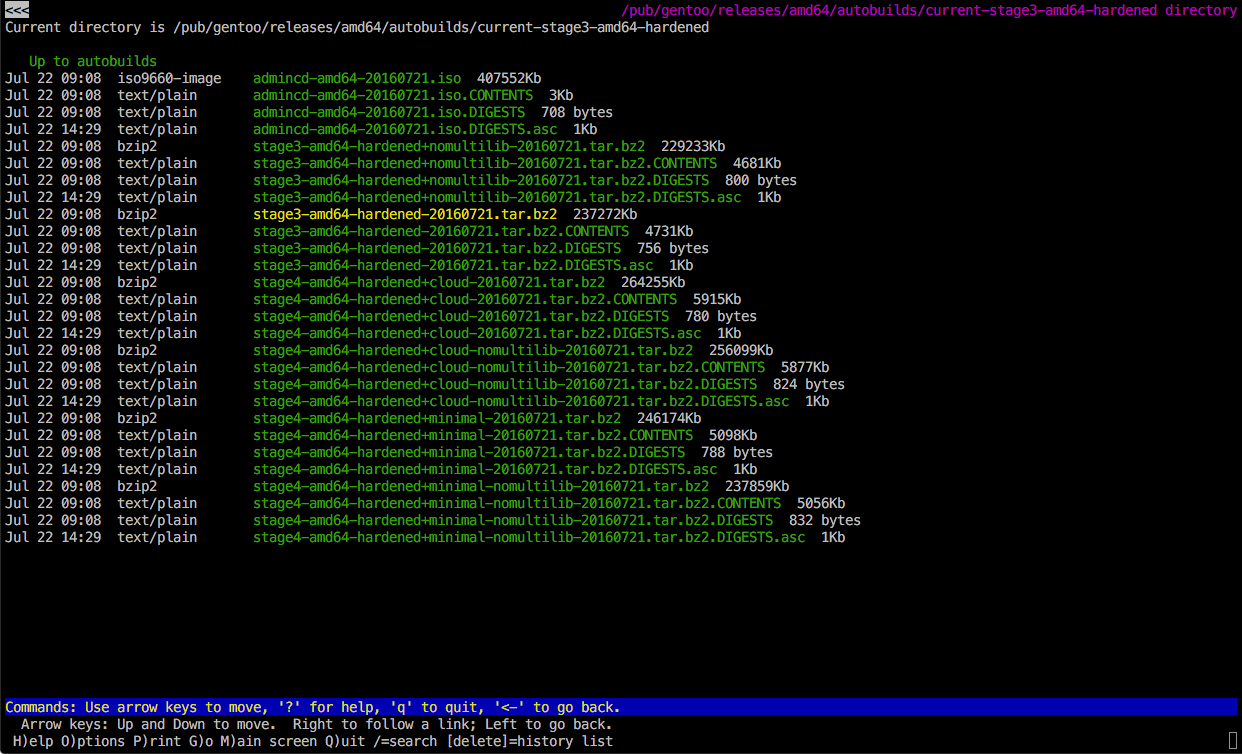
Fig. 4 Downloading the stage 3 tarball with lynx.
Verify the files in the same way as the ISO file (Setup):
# gpg --keyserver hkps.pool.sks-keyservers.net --recv-keys 0xBB572E0E2D182910
# gpg --verify stage3-amd64-hardened-20160609.tar.bz2.DIGESTS.asc
# sha512sum stage3-amd64-hardened-20160609.tar.bz2
Unpack the tarball [14]:
# tar xvjpf stage3-*.tar.bz2 --xattrs
Picking an editor
The remaining steps require edits to many configuration files. The editor installed by default is nano. To install vim, run:
# emerge vim
Configuring compile options
The compile options go in /mnt/gentoo/etc/portage/make.conf. Good values are [15]:
CFLAGS="-march=native -O2 -pipe"
# Use the same settings for both variables
CXXFLAGS="${CFLAGS}"
The -march=native causes GCC to detect the CPU architecture [16]. The -O2 enables optimizations, and the -pipe makes GCC use pipes rather than temporary files. This makes GCC go faster, but requires more memory. The CXXFLAGS are set to equal the CFLAGS.
Also set the MAKEOPTS in /mnt/gentoo/etc/portage/make.conf:
MAKEOPTS="-j9 -l8"
Because I had an i7-6700K processor which has 4 cores and hyper-threading, the processor can run 8 threads at once. Thus, the -j options sets the maximum number of parallel compilation jobs to be 9, and the -l option prevents a new parallel job from starting unless the load is below 8 jobs [17].
Configuring the main Gentoo repository
Make a directory to hold the repository configuration:
# mkdir /mnt/gentoo/etc/portage/repos.conf
Copy the default file to the new directory [18]:
# cp /mnt/gentoo/usr/share/portage/config/repos.conf /mnt/gentoo/etc/portage/repos.conf/gentoo.conf
Copy DNS configuration
To set up the DNS configuration in the new Gentoo environment, copy the current configuration into the new environment [19]:
# cp -L /etc/resolv.conf /mnt/gentoo/etc/
Mount the filesystems
Make all the filesystems available in the new environment [20]:
# mount -t proc proc /mnt/gentoo/proc
# mount --rbind /sys /mnt/gentoo/sys
# mount --make-rslave /mnt/gentoo/sys
# mount --rbind /dev /mnt/gentoo/dev
# mount --make-rslave /mnt/gentoo/dev
Enter the new environment
This step changes the root directory from that of the installation drive to the computer’s hard drive:
# chroot /mnt/gentoo /bin/bash
# source /etc/profile
# export PS1="(chroot) $PS1"
Sourcing the /etc/profile file loads the settings into the new environment, and changing the prompt (the PS1 value) makes it clear that the computer is in the new environment.
Configuring portage
First, update the portage tree:
# emerge-webrsync
Then, check the profile:
# eselect profile list
Available profile symlink targets:
  [1]   default/linux/amd64/13.0
  [2]   default/linux/amd64/13.0/selinux
  [3]   default/linux/amd64/13.0/desktop
  [4]   default/linux/amd64/13.0/desktop/gnome
  [5]   default/linux/amd64/13.0/desktop/gnome/systemd
  [6]   default/linux/amd64/13.0/desktop/kde
  [7]   default/linux/amd64/13.0/desktop/kde/systemd
  [8]   default/linux/amd64/13.0/desktop/plasma
  [9]   default/linux/amd64/13.0/desktop/plasma/systemd
  [10]  default/linux/amd64/13.0/developer
  [11]  default/linux/amd64/13.0/no-multilib
  [12]  default/linux/amd64/13.0/systemd
  [13]  default/linux/amd64/13.0/x32
  [14]  hardened/linux/amd64 *
  [15]  hardened/linux/amd64/selinux
  [16]  hardened/linux/amd64/no-multilib
  [17]  hardened/linux/amd64/no-multilib/selinux
  [18]  hardened/linux/amd64/x32
  [19]  hardened/linux/musl/amd64
  [20]  hardened/linux/musl/amd64/x32
  [21]  default/linux/uclibc/amd64
  [22]  hardened/linux/uclibc/amd64
The selected profile should be hardened/linux/amd64. The profile specifies default values for many variables [21].
To change the profile, use the following command, with the number of the desired profile:
# eselect profile set 14
The Gentoo handbook [21] recommends running the following command after changing the profile:
# emerge --ask --update --deep --newuse @world
However, this is only necessary if the new profile uses systemd.
Next, configure the USE variable. To see the current use flags, use:
# emerge --info | grep ^USE
The USE variable is set in /etc/portage/make.conf. The original value was USE="bindist mmx sse sse2". I added qt4 and kde because I planned on using the KDE desktop environment later, and I added alsa for sound support [22].
Configure the timezone
Put the desired timezone in /etc/timezone:
# echo "America/New_York" > /etc/timezone
To determine the proper timezone, look in /usr/share/zoneinfo/, and the path to the desired place is the timezone name. Next, reconfigure the sys-libs/timezone-data package to set the local time:
# emerge --config sys-libs/timezone-data
Configure the locale
Uncomment or add the proper locales to /etc/locale.gen. I used:
en_US ISO-8859-1
en_US.UTF-8 UTF-8
Run locale-gen to generate the locales:
# locale-gen
 * Generating locale-archive: forcing # of jobs to 1
 * Generating 2 locales (this might take a while) with 1 jobs
 *  (1/2) Generating en_US.ISO-8859-1 ...                         [ ok ]
 *  (2/2) Generating en_US.UTF-8 ...                              [ ok ]
 * Generation complete
Then, select the right locale (I chose the en_US.utf8 [23]):
# eselect locale list
Available targets for the LANG variable:
  [1]   C
  [2]   en_US
  [3]   en_US.iso88591
  [4]   en_US.utf8 *
  [5]   POSIX
  [ ]   (free form)
# eselect locale set 4
Next, reload the environment:
# env-update && source /etc/profile && export PS1="(chroot) $PS1"
Kernel
There are two main choices for the kernel: the normal kernel or the hardened kernel. The hardened kernel includes the grsecurity patch, which provides PaX [24]. PaX increases the system’s security with non-executable memory, Address Space Layout Randomization (ASLR), and other features. To build a normal kernel, ignore the grsecurity options in the configuration below.
Install the sources
For the normal kernel:
# emerge sys-kernel/gentoo-sources
For the hardened kernel:
# emerge sys-kernel/hardened-sources
The kernel sources are installed into /usr/src. The file /usr/src/linux is a symbolic link to the most recently installed kernel. For example, with both the hardened sources and the normal sources installed, /usr/src might look like this:
# ls -Fl
total 8
lrwxrwxrwx  1 root root   23 Jun  8 19:48 linux -> linux-4.4.8-hardened-r1/
drwxr-xr-x 26 root root 4096 Jun  7 22:04 linux-4.4.6-gentoo/
drwxr-xr-x 26 root root 4096 Jun 21 14:29 linux-4.4.8-hardened-r1/
Configure the kernel
There are two ways to configure the kernel: manually and automatically. While building the kernel manually is more time-consuming, it generally produces a kernel which boots faster then the automatically generated kernel because the automatically generated kernel has to detect all the hardware at boot time and load the proper modules. This section explains how to configure the kernel manually. For information about how to configure it automatically with genkernel, see https://wiki.gentoo.org/wiki/Handbook:AMD64/Installation/Kernel#Alternative:_Using_genkernel.
First, determine the system’s hardware using lspci:
# emerge sys-apps/pciutils
lspci
00:00.0 Host bridge: Intel Corporation Sky Lake Host Bridge/DRAM Registers (rev 07)
00:02.0 VGA compatible controller: Intel Corporation Sky Lake Integrated Graphics (rev 06)
00:14.0 USB controller: Intel Corporation Sunrise Point-H USB 3.0 xHCI Controller (rev 31)
00:14.2 Signal processing controller: Intel Corporation Sunrise Point-H Thermal subsystem (rev 31)
00:16.0 Communication controller: Intel Corporation Sunrise Point-H CSME HECI #1 (rev 31)
00:17.0 SATA controller: Intel Corporation Device a102 (rev 31)
00:1c.0 PCI bridge: Intel Corporation Sunrise Point-H PCI Express Root Port #1 (rev f1)
00:1c.4 PCI bridge: Intel Corporation Sunrise Point-H PCI Express Root Port #5 (rev f1)
00:1c.6 PCI bridge: Intel Corporation Sunrise Point-H PCI Express Root Port #7 (rev f1)
00:1d.0 PCI bridge: Intel Corporation Sunrise Point-H PCI Express Root Port #9 (rev f1)
00:1f.0 ISA bridge: Intel Corporation Sunrise Point-H LPC Controller (rev 31)
00:1f.2 Memory controller: Intel Corporation Sunrise Point-H PMC (rev 31)
00:1f.3 Audio device: Intel Corporation Sunrise Point-H HD Audio (rev 31)
00:1f.4 SMBus: Intel Corporation Sunrise Point-H SMBus (rev 31)
00:1f.6 Ethernet controller: Intel Corporation Ethernet Connection (2) I219-V (rev 31)
02:00.0 USB controller: ASMedia Technology Inc. ASM1142 USB 3.1 Host Controller
03:00.0 Network controller: Broadcom Corporation BCM4352 802.11ac Wireless Network Adapter (rev 03)
Then, change to the kernel source directory with cd /usr/src/linux, and enter the kernel configuration menu with make menuconfig. Then, try to select all the right options. Here are the options I selected (which were either not selected by default or which are important), with some short comments about why I selected them (My computer had a BCM4352 wireless card which required the broadcom-sta driver):
1 2 3 4 5 6 7 8 9 10 11 12 13 14 15 16 17 18 19 20 21 22 23 24 25 26 27 28 29 30 31 32 33 34 35 36 37 38 39 40 41 42 43 44 45 46 47 48 49 50 51 52 53 54 55 56 57 58 59 60 61 62 63 64 65 66 67 68 69 70 71 72 73 74 75 76 77 78 79 80 81 82 83 84 85 86 87 88 89 90 91 92 93 94 95 96 97 98 99 100 101 102 103 104 105 106 107 108 109 110 111 112 113 114 115 | General setup --->
Stack Protector buffer overflow detection (Strong)
Processor type and features --->
[*] EFI Runtime service support --->
[*] EFI stub support
[ ] EFI mixed-mode support
Power management and ACPI options --->
[*] Suspend to RAM and standby
[*] Opportunistic sleep
[*] SMT (Hyperthreading) scheduler support
[*] Multi-core scheduler support
Networking support --->
-*- Wireless --->
<*> cfg80211 - wireless configuration API
[*] enable powersave by default
[*] cfg80211 wireless extensions compatibility
< > Generic IEEE 802.11 Networking Stack (mac80211) # Must be disabled for broadcom-sta to work
Device Drivers --->
<*> Sound card support --->
<*> Advanced Linux Sound Architecture --->
HD-Audio --->
[*] Support digital beep via input layer
(1) Digital beep registration mode (0=off, 1=on)
<*> Build Realtek HD-audio coced support
<*> Build HDMI/DisplayPort HD-audio codec support
# To prevent the error:
# Too many HDMI devices
# Consider building the kernel with CONFIG_SND_DYNAMIC_MINORS=y
[*] Dynamic device file minor numbers
(32) Max number of sound cards
HID support --->
Special HID drivers --->
<*> Corsair devices
[*] Real Time Clock --->
[*] Set system time from RTC on startup and resume
[*] USB support --->
<*> Support for Host-side USB
[*] xHCI HCD (USB 3.0) support
< > Generic xHCI driver for a platform device
<*> EHCI HCD (USB 2.0) support
[ ] Root Hub Transaction Translators
[*] Improved Transaction Translator scheduling
[*] Multiple devices drive support (RAID and LVM) --->
<*> Device mapper support
<*> Crypt target support # Needed for encrypted disk
[*] Network device support --->
[*] Wireless LAN --->
< > Broadcom 43xx wireless support (mac80211 stack)
<*> Intel PRO/Wireless 2100 Network Connection # Needed for broadcom-sta
[ ] Enable promiscuous mode
[ ] Enable full debugging output in IPW2100 module
[*] Ethernet driver support --->
[*] Intel devices
<*> Intel (R) PRO/1000 PCI-Express Gigabit Ethernet support
# These 2 must be disabled for broadcom-sta
Broadcom specific AMBA --->
< > BCMA support
Sonics Silicon Backplane --->
< > Sonics Silicon Backplane support
# For sensors
I2C support --->
-*- I2C support
<*> I2C device interface
-*- Hardware Monitoring support --->
<*> Intel Core/Core2/Atom temperature sensor
<*> Nuvoton NCT6775F and compatibles
File systems --->
<*> Second extended fs support --->
-*- Ext2 extended attributes --->
[*] Ext2 POSIX Axxess Control Lists
[*] Ext2 Security Labels
<*> The Extended 3 (ext3) filesystem --->
[*] Ext3 POSIX Access Control Lists
[*] Ext3 Security Labels
-*- The Extended 4 (ext4) filesystem
-*- Ext4 POSIX Access Control Lists
-*- Ext4 Security Labels
< > Ext4 Encryption
[ ] EXT4 debugging support
<*> FUSE (Filesystem in Userspace) support
<*> Character device in Userspace support
[*] Miscellaneous filesystems --->
<*> Apple Macintosh file system support
<*> Apple Extended HFS file system support --->
[*] HFS+ POSIX Access Control Lists
Security options --->
Grsecurity --->
[*] Grsecurity
Configuration Method (Automatic)
Usage Type (Desktop)
Virtualization Type (Host)
Virtualization Hardware (EPT/RVI Processor Support)
Virtualization Software (VirtualBox)
Required Priorities (Performance)
Customize Configuration --->
PaX --->
[*] Enable various PaX features
PaX Control --->
[ ] Support soft mode
[ ] Use ELF program header marking
[*] Use filesystem extended attributesmarking
Cryptographic API --->
-*- CBC support
-*- ECB support
-*- XTS support
-*- CRC32c CRC algorithm
<*> CRC32c INTEL hardware acceleration
-*- Michael MIC keyed digest algorithm
-*- SH1 digest algorithm
<*> SHA1 digest algorithm (SSSE3/AVX/AVX2/SHA-NI)
<*> SHA256 digest algorithm (SSSE3/AVX/AVX2/SHA-NI)
<*> SHA512 digest algorithm (SSSE3/AVX/AVX2)
-*- AES cipher algorithms
-*- AES cipher algorithms (x86_64)
<*> AES cipher algorithms (AES-NI)
|
Compile the kernel with make && make modules_install. Then, run make install to copy the kernel to /boot. Make sure /boot is mounted (at this point in the guide, it should be mounted).
Make the initramfs
Because the root partition is encrypted, and the commands to decrypt it are stored on the root partition, the computer will need an initial RAM file system (initramfs) in order to decrypt the root partition when it boots. One easy way to make it is with genkernel [25]. First, install it:
# emerge sys-kernel/genkernel
To boot, the system needs:
lvm: because the computer uses LVMluks: to decrypt the drivegpg: to decrypt the encrypted key filebusybox: to look nice when bootingdisklabel: to find disks by UUID (used later)
Make sure all these programs are installed:
# emerge sys-fs/cryptsetup sys-apps/busybox app-crypt/gnupg
There are two ways to set the initramfs options. The first is with command line options:
# genkernel --lvm --luks --gpg --busybox --disklabel --install initramfs
The second way is to set the options in /etc/genkernel.conf. To do that, add the following lines:
LVM="yes"
LUKS="yes"
GPG="yes"
BUSYBOX="yes"
DISKLABEL="yes"
Then, run genkernel:
# genkernel --install initramfs
By saving the parameters, it is easy to regenerate the initramfs. However, when genkernel gets updated, portage will download a new copy of /etc/genkernel.conf, and ask you to invoke etc-update to handle the differences.
Naming the files
All the new kernel files were installed in /boot:
# ls -Fl /boot
total 47084
-rw-r--r-- 1 root root  104174 Jun 20 07:10 config-4.4.8-hardened-r1
-rw-r--r-- 1 root root 3445174 Jun 20 07:10 System.map-4.4.8-hardened-r1
-rw-r--r-- 1 root root 7113312 Jun 20 07:10 vmlinux-4.4.8-hardened-r1
-rw-r--r-- 1 root root 5774460 Jun 20 07:10 initramfs-genkernel-x86_64-4.4.8-hardened-r1
Each kernel has four files: the configuration used to make it, an initramfs, a kernel file, and a System.map. The kernel will initially have a name that starts with vmlinux, but it can be renamed to start with kernel too. The initramfs file must start with either initramfs or initrd and must end with .img unless it is named with the default genkernel name [26]. They all must have the same suffix. Because I had an automatically generated kernel, I wanted to make it clear that this kernel was manually configured, so I changed the suffix on all the files to 4.4.8-hardened-r1-manual. I also changed my kernel to start with kernel:
# ls -Fl /boot
total 36608
-rw-r--r-- 1 root root  104171 Jun 20 07:10 config-4.4.8-hardened-r1-manual
-rw-r--r-- 1 root root 2777140 Jun 20 07:10 initramfs-4.4.8-hardened-r1-manual.img
-rw-r--r-- 1 root root 7064480 Jun 20 07:10 kernel-4.4.8-hardened-r1-manual
-rw-r--r-- 1 root root 3431015 Jun 20 07:10 System.map-4.4.8-hardened-r1-manual
System Configuration
Filesystem Mounting
The /etc/fstab file controls how partitions are mounted. It is a table composed of 6 fields per row:
<partition> <mountpoint> <file system> <options> <dump> <pass>
The partition can be specified with a path like /dev/sda3 or with a UUID like UUID=308c6383-ab83-40d1-823a-676ff7ec475d or with a PARTUUID like PARTUUID=3f63ebb3-b9b7-4180-aa5d-ac3fd33e87c2 (use whichever is used by blkid). While /dev/sd* style devices generally work, they could change if drives are plugged into different ports on the motherboard or if new drives are added. To determine the UUID of a drive, use blkid:
# blkid
/dev/sda1: SEC_TYPE="msdos" UUID="649B-BEC3" TYPE="vfat" PARTLABEL="grub" PARTUUID="3f63ebb3-b9b7-4180-aa5d-ac3fd33e87c2"
/dev/sda2: UUID="308c6383-ab83-40d1-823a-676ff7ec475d" TYPE="ext4" PARTLABEL="boot" PARTUUID="28cf59de-815b-4760-8697-26d01eccaa13"
/dev/sda3: UUID="6736ac91-fa8c-4736-83f5-3c7996c9e678" TYPE="crypto_LUKS" PARTLABEL="rootfs" PARTUUID="34024962-293f-45c2-92e1-a0e6c3d6499f"
/dev/mapper/encr: UUID="rz2zxF-GWxf-NMbG-MdzE-TDV5-yAUW-Ix0Fy6" TYPE="LVM2_member"
/dev/mapper/vg1-swap: UUID="dff59ad6-9f75-4a2b-816c-bcfa9ad861de" TYPE="swap"
/dev/mapper/vg1-root: UUID="ecb7836f-e6ee-480a-b4ab-67071657d789" TYPE="ext4"
The mount point is the directory where the file system should be mounted. The options specify options to use when mount mounts the partition. The common ones are [27]:
noauto: does not mount the partition automatically (to use it, the user must mount it)noatime: does not record the time at which files are accessed. This makes the system faster.discard: makes theTRIMcommand work when using SSDs with theext4orbtrfsfilesystems.errors=remount-ro: if there are errors when mounting, mount the file system read only.sw: swap
The dump field is normally 0 [27].The pass field controls the order in which the filesystem is checked for errors. The drives marked with 1 are checked first, then the drives marked with 2. The drives marked with 0 are never checked. The root filesystem should be checked first, followed by all the others [27]. Swap does not need to be checked.
Edit /etc/fstab to look like this (substituting in the right UUIDs and removing discard if not using an SSD):
UUID=308c6383-ab83-40d1-823a-676ff7ec475d       /boot      ext4  noauto,noatime,discard             0 2
UUID=ecb7836f-e6ee-480a-b4ab-67071657d789       /          ext4  noatime,discard,errors=remount-ro  0 1
UUID=dff59ad6-9f75-4a2b-816c-bcfa9ad861de       none       swap  sw                                 0 0
PARTUUID=3f63ebb3-b9b7-4180-aa5d-ac3fd33e87c2   /boot/efi  vfat  noauto,noatime,discard             0 2
Name the computer
Give the computer a good name by editing /etc/conf.d/hostname. The syntax is hostname="supercoolgentoocomputer".
Configuring ethernet
For now, set up basic ethernet. Later in the guide, I discus WiFi. First, determine the network interface name, by looking in the /sys/class/net directory:
# ls -Fl /sys/class/net
total 0
lrwxrwxrwx 1 root root 0 Jun 20 18:08 enp0s31f6 -> ../../devices/pci0000:00/0000:00:1f.6/net/enp0s31f6/
lrwxrwxrwx 1 root root 0 Jun 20 18:08 lo -> ../../devices/virtual/net/lo/
lrwxrwxrwx 1 root root 0 Jun 20 18:08 sit0 -> ../../devices/virtual/net/sit0/
lrwxrwxrwx 1 root root 0 Jun 20 18:08 wlp3s0 -> ../../devices/pci0000:00/0000:00:1c.6/0000:03:00.0/net/wlp3s0/
enp0s31f6 is the Ethernet card, and wlp3s0 is the wireless card.
To set up simple DHCP, type the line config_enp0s31f6 ="dhcp" into /etc/conf.d/net [28].
Also, install a DHCP daemon:
# emerge net-misc/dhcpcd
Now, make the networking start at boot:
# cd /etc/init.d
# ln -s net.lo net.enp0s31f6
# rc-update add net.enp0s31f6 default
Set a root password
The root account can do anything to the computer, so it needs a password. Set one:
# passwd
Set up a system logger
There are many loggers (https://wiki.gentoo.org/wiki/Handbook:AMD64/Installation/Tools#System_logger), but sysklogd is one of the simplest:
# emerge app-admin/sysklogd
rc-update add sysklogd default
With sysklogd, I got an error like the following: sysklogd: /dev/xconsole: No such file or directory printed out about once a day. To fix it, I commented out the following section in /etc/syslog.conf [29]:
daemon.*;mail.*;\
       news.err;\
       *.=debug;*.=info;\
       *.=notice;*.=warn       |/dev/xconsole
Also about once a day, I got errors like:
syslogd: /var/log/news/news.crit: No such file or directory
syslogd: /var/log/news/news.err: No such file or directory
syslogd: /var/log/news/news.notice: No such file or directory
I fixed those by creating the three directories [30].
Another way to avoid these errors would be to use a different logger.
Set up a cron daemon
A cron daemon runs commands at scheduled times. Again, there are many (https://wiki.gentoo.org/wiki/Handbook:AMD64/Installation/Tools#Optional:_Cron_daemon). Emerge one and add it to the default runlevel:
# emerge sys-process/cronie
# rc-update add cronie default
LVM
Because the system uses LVM, it must start at boot:
# rc-update add lvm boot
When I did not have LVM running, I got the following error message every time I did something involving disks:
WARNING: failed to connect lvmetad. Falling back to internal scanning
Bootloader
Installing the bootloader
I used the GRand Unified Bootloader version 2 (GRUB2). To use GRUB2 with UEFI, add the following to /etc/portage/make.conf:
GRUB_PLATFORMS="efi-64"
Then, install GRUB2:
# emerge sys-boot/grub:2
Install GRUB2 to the EFI partition (/dev/sda1), which is mounted at /boot/efi [31]:
# grub-install --target=x86_64-efi --efi-directory=/boot/efi
If this outputs errors like EFI variables are not supported on this system, then the system is not currently booted using UEFI, and it will be impossible to install a UEFI version of GRUB without rebooting the system using UEFI.
Next, configure GRUB by editing /etc/default/grub. The only parameter required to make the system boot is GRUB_CMDLINE_LINUX_DEFAULT, which specifies the options passed to the linux kernel. In order to boot from an encrypted drive, the kernel requires the following options:
crypt_root: the encrypted partition (in this case/dev/sda3)real_root: the decrypted root partition (in this case/dev/mapper/vg1-root)root_keydev: the partition which the encrypted key file is stored, if a key file is usedroot_key: the path to the key file on theroot_keydevparition, if a key file is useddolvm: enables LVM support
Thus, to boot with an encrypted key file named keyfile.bin.gpg stored on a flash drive with a UUID of 308c6383-ab83-40d1-823a-676ff7ec475d (use the UUID for the flash drive because it can be unplugged and will not always stay at /dev/sdc1, for example), set GRUB_CMDLINE_LINUX_DEFAULT to the following (substituting in the right UUIDs):
GRUB_CMDLINE_LINUX_DEFAULT="crypt_root=UUID=6736ac91-fa8c-4736-83f5-3c7996c9e678 real_root=/dev/mapper/vg1-root root_keydev=UUID=308c6383-ab83-40d1-823a-676ff7ec475d root_key=keyfile.bin.gpg dolvm"
To boot with a passphrase, omit the keyfile parameters:
GRUB_CMDLINE_LINUX_DEFAULT="crypt_root=UUID=6736ac91-fa8c-4736-83f5-3c7996c9e678 real_root=/dev/mapper/vg1-root dolvm"
There is one other GRUB option that appears relevant: GRUB_ENABLE_CRYPTODISK=y. However, that is only needed when the boot partition is also encrypted. Without an encrypted boot partition, that option causes the error error: device name required on boot. Leave it commented out.
Now, generate the GRUB2 configuration file [31]:
# grub-mkconfig -o /boot/grub/grub.cfg
Rebooting
The final test is rebooting the system. If everything is right, it will boot from the new Gentoo installation, prompt for a passphrase if needed, decrypt the drive, and boot completely. To reboot, exit the chroot, unmount the partitions, and reboot:
# exit
# umount -l /mnt/gentoo/dev{/shm,/pts,}
# umount /mnt/gentoo{/boot,/sys,/proc,}
# reboot
Rescue
If the computer fails to boot fully, reboot it from the installation flash drive, remount the filesystems, and then enter the chroot and try to fix it. To do so, first open the encrypted drive:
# cryptsetup --key-file /media/usb/keyfile.bin luksOpen /dev/sda3 encr
Activate the volume group:
# vgchange -a y vg1
Activate the swap:
# swapon /dev/vg1/swap
Mount the partitions:
# mkdir -p /mnt/gentoo
# mount /dev/vg1/root /mnt/gentoo
# mkdir -p /mnt/gentoo/boot
# mount /dev/sda2 /mnt/gentoo/boot
# mkdir -p /mnt/gentoo/boot/efi
# mount /dev/sda1 /mnt/gentoo/boot/efi
Copy the DNS information:
# cp -L /etc/resolv.conf /mnt/gentoo/etc/
Mount the filesystems:
# mount -t proc proc /mnt/gentoo/proc
# mount --rbind /sys /mnt/gentoo/sys
# mount --make-rslave /mnt/gentoo/sys
# mount --rbind /dev /mnt/gentoo/dev
# mount --make-rslave /mnt/gentoo/dev
Enter the new Gentoo installation:
# chroot /mnt/gentoo /bin/bash
# source /etc/profile
# export PS1="(chroot) $PS1"
Then, try to find and fix any problems.
Footnotes
| [1] | For alternatives, see: https://forums.gentoo.org/viewtopic-p-7444862.html?sid=30a9928dedbe572722345bcf720d8879#7444862. |
| [2] | Data from: http://unix.stackexchange.com/questions/9432/is-there-a-way-to-determine-the-optimal-value-for-the-bs-parameter-to-dd/9492#9492. |
| [3] | For more information about booting, see: https://wiki.gentoo.org/wiki/Handbook:AMD64/Installation/Media. |
| [4] | UEFI is a replacement for the Basic Input/Output System (BIOS). |
| [5] | See http://www.ibm.com/developerworks/library/l-lpic1-104-1/ for more information about partitioning and type codes. |
| [6] | See https://wiki.gentoo.org/wiki/Handbook:AMD64/Installation/Disks#Creating_the_BIOS_boot_partition. |
| [7] | See https://www.jamescoyle.net/knowledge/951-the-difference-between-a-tmpfs-and-ramfs-ram-disk. |
| [8] | Some people suggest using /dev/random for cryptographic purposes, claiming that it is more random than /dev/urandom. For a detailed discussion, see: http://www.2uo.de/myths-about-urandom/. |
| [9] | See http://security.stackexchange.com/questions/26594/filling-the-disk-with-random-data-prior-to-encryption. |
| [10] | For a detailed discussion of the cipher and hash combination, see https://wiki.gentoo.org/wiki/DM-Crypt_LUKS#Which_cipher:hash_combination.3F. Also, for information about key lengths, see: https://www.keylength.com/en/4/. |
| [11] | For a discussion about how big to make it, see: https://wiki.gentoo.org/wiki/Handbook:AMD64/Installation/Disks#Designing_a_partition_scheme. Also, some people suggest making it continuous (https://www.preney.ca/paul/archives/389), but that does not seem to be necessary: http://unix.stackexchange.com/questions/58265/does-swap-need-to-be-on-a-contiguous-lvm-logical-volume. |
| [12] | For information about choosing a filesystem, see: https://wiki.gentoo.org/wiki/Handbook:AMD64/Installation/Disks#Creating_file_systems. |
| [13] | For a detailed discussion, see: https://wiki.gentoo.org/wiki/Handbook:AMD64/Installation/Stage#Choosing_a_stage_tarball. |
| [14] | For information about the options, see: https://wiki.gentoo.org/wiki/Handbook:AMD64/Installation/Stage#Unpacking_the_stage_tarball. |
| [15] | For more information, see: https://wiki.gentoo.org/wiki/Handbook:AMD64/Installation/Stage#Configuring_compile_options. |
| [16] | For more information, see: https://wiki.gentoo.org/wiki/CFLAGS. |
| [17] | The general consensus for the value of MAKEOPTS is either the number of cores or the number of cores plus 1. The Gentoo Handbook recommends the number of cores plus 1: https://wiki.gentoo.org/wiki/Handbook:AMD64/Installation/Stage#MAKEOPTS. However, according to one test, using just the number of cores results in faster compilation: https://blogs.gentoo.org/ago/2013/01/14/makeopts-jcore-1-is-not-the-best-optimization/. Finally, the -l option is recommended by https://www.preney.ca/paul/archives/341. I have not run any tests myself, and use -j9 -l8. I will try to test it later. |
| [18] | For more information, see: https://wiki.gentoo.org/wiki/Handbook:AMD64/Installation/Base#Main_Gentoo_repository. |
| [19] | For more information, see: https://wiki.gentoo.org/wiki/Handbook:AMD64/Installation/Base#Copy_DNS_info |
| [20] | For more information, see: https://wiki.gentoo.org/wiki/Handbook:AMD64/Installation/Base#Mounting_the_necessary_filesystems. |
| [21] | (1, 2) For more information, see: https://wiki.gentoo.org/wiki/Handbook:AMD64/Installation/Base#Choosing_the_right_profile |
| [22] | For a list of all the USE flags, see: https://www.gentoo.org/support/use-flags/. |
| [23] | For more information on locales, see: https://wiki.gentoo.org/wiki/Localization/Guide. |
| [24] | For more information, see: https://wiki.gentoo.org/wiki/Hardened/PaX_Quickstart |
| [25] | There are many other programs which can generate an initramfs. See https://wiki.gentoo.org/wiki/Initramfs. |
| [26] | See the GRUB page for more information on naming: https://wiki.gentoo.org/wiki/GRUB2_Quick_Start#Kernel_naming_scheme. |
| [27] | (1, 2, 3) For more information, see: https://wiki.gentoo.org/wiki/Handbook:AMD64/Installation/System#Filesystem_information. |
| [28] | For more complex network configurations, see: https://wiki.gentoo.org/wiki/Handbook:AMD64/Installation/System#Configuring_the_network. |
| [29] | See https://forums.gentoo.org/viewtopic-t-1042218-start-0.html. |
| [30] | See https://forums.gentoo.org/viewtopic-t-881147-start-0.html. |
| [31] | (1, 2) All the grub commands used to have a grub2- prefix, but the 2 was removed. |